You only get one shot at this. Seriously. When it comes to how to document hail damage for an insurance claim, the way you collect and present evidence can directly impact how much you’re paid or whether you’re paid at all. I’ve seen homeowners rush the process, take a handful of photos, and assume that’s enough. It’s not. And it can cost thousands.
This guide is built for you if you’re still in the research phase. Before you hire anyone. Before you file or finalize anything. You’ll learn exactly how to document hail damage for an insurance claim in a way that strengthens your position, supports every dollar, and removes doubt from your file. Let’s walk through it step by step, with clarity and strategy.
Why Proper Hail Damage Documentation Matters
Insurance companies don’t pay for possibilities. They pay for proof. That’s the starting point. When your documentation is strong, your claim becomes easier to validate. When it’s weak, your claim becomes easier to question. It’s that simple. The adjuster reviewing your file wasn’t there during the storm. They rely entirely on what you provide.
Strong documentation does four important things:
- It clearly shows the existence of damage
- It connects that damage to a specific storm event
- It demonstrates the severity and scope of the loss
- It supports accurate repair or replacement costs
Weak documentation? It does the opposite. It creates gaps. And gaps lead to reduced payouts or denials. In storm-prone coastal regions like Corpus Christi, this becomes even more important. Storms can be highly localized. One neighborhood gets hit hard. Another barely sees impact. That means your evidence needs to stand on its own not on assumptions about the storm.
What Counts as Hail Damage? (Know What to Look For)
Before you document anything, you need to know what you’re actually looking at. Not every mark is hail damage. But many real impacts are subtle and easy to overlook.
Let’s break it down.
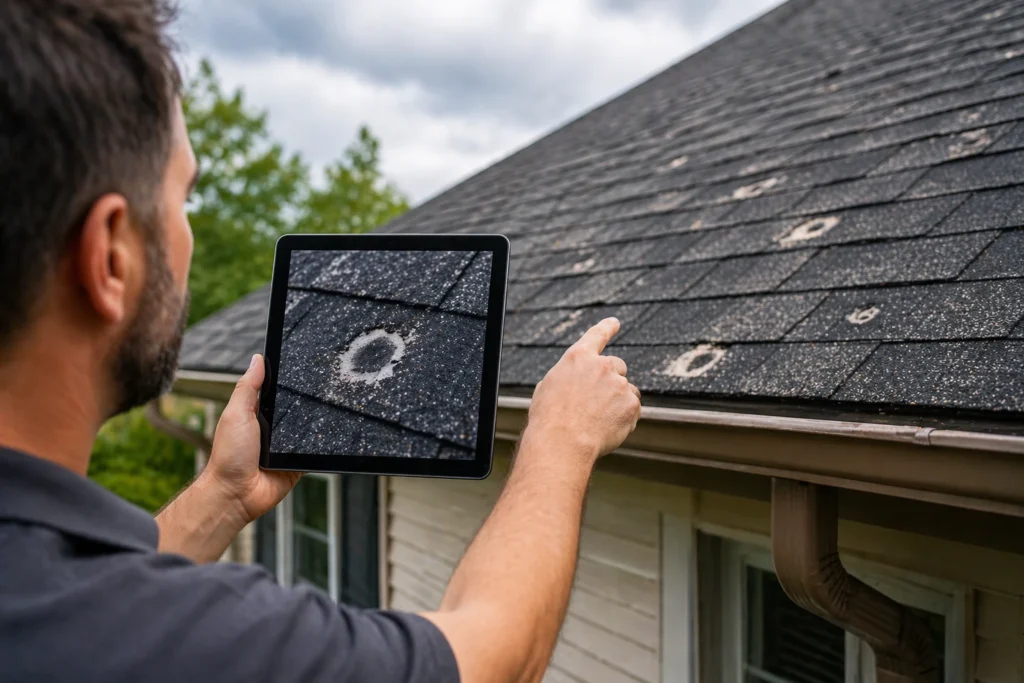
Roof Damage Indicators
This is where most claims focus.
- Bruising: Press gently on a shingle. If it feels soft or spongy, that’s impact damage.
- Granule loss: You’ll see darker patches where protective granules have been knocked off.
- Circular indentations: Often small, but consistent across slopes.
- Cracked shingles: Especially around impact points.
These signs might not look dramatic but they matter.
Exterior Property Damage
Hail doesn’t just hit the roof.
- Gutters and downspouts may show dents
- Siding can crack or chip
- Window screens may have tears or holes
- Mailboxes, fences, and AC units often show clear impacts
These are valuable because they’re easier to see and they help confirm the storm’s intensity.
Hidden Damage Most Homeowners Miss
This is where claims often fall short.
- Damaged flashing around vents or chimneys
- Compromised underlayment beneath shingles
- Ridge cap fractures
- Micro-cracks that worsen over time
You may not spot these immediately. But they exist and they can increase claim value significantly.
When to Start Documenting Hail Damage
Right after the storm. No delay. Timing matters more than most people realize. The closer your documentation is to the event, the stronger your claim becomes. Fresh damage is easier to verify. Older damage invites questions.
Here’s what to do immediately:
- Take initial photos from the ground
- Note the exact date and time
- Start a simple damage log
- Walk around the property carefully
In Corpus Christi, where storms can roll through quickly and overlap with other weather events, documenting early helps establish a clear timeline. That timeline becomes critical when insurers review your claim.
Safety First: Before You Start Documenting
Let’s keep this practical. No documentation is worth a fall or injury.
Stay safe. Always.
Safety Checklist
- Avoid climbing onto wet or unstable roofs
- Wear shoes with proper grip
- Use a sturdy ladder—and only if you’re confident
- Stay clear of power lines or debris
- When in doubt, document from the ground
You can gather a surprising amount of evidence without ever stepping onto the roof.
Tools You Need to Document Hail Damage Properly
You don’t need specialized equipment. But you do need the right basics.
| Tool | Why It Matters |
| Smartphone or Camera | Clear, high-resolution images |
| Measuring Tape or Ruler | Shows size of damage |
| Coin (quarter works well) | Quick scale reference |
| Notebook or Notes App | Records observations |
| Flashlight | Helps inspect attic or shaded areas |
| Drone (optional) | Safe way to capture roof images |
Keep it simple. But use each tool intentionally.
Step-by-Step: How to Document Hail Damage for an Insurance Claim
This is the core process. Follow it carefully and consistently.
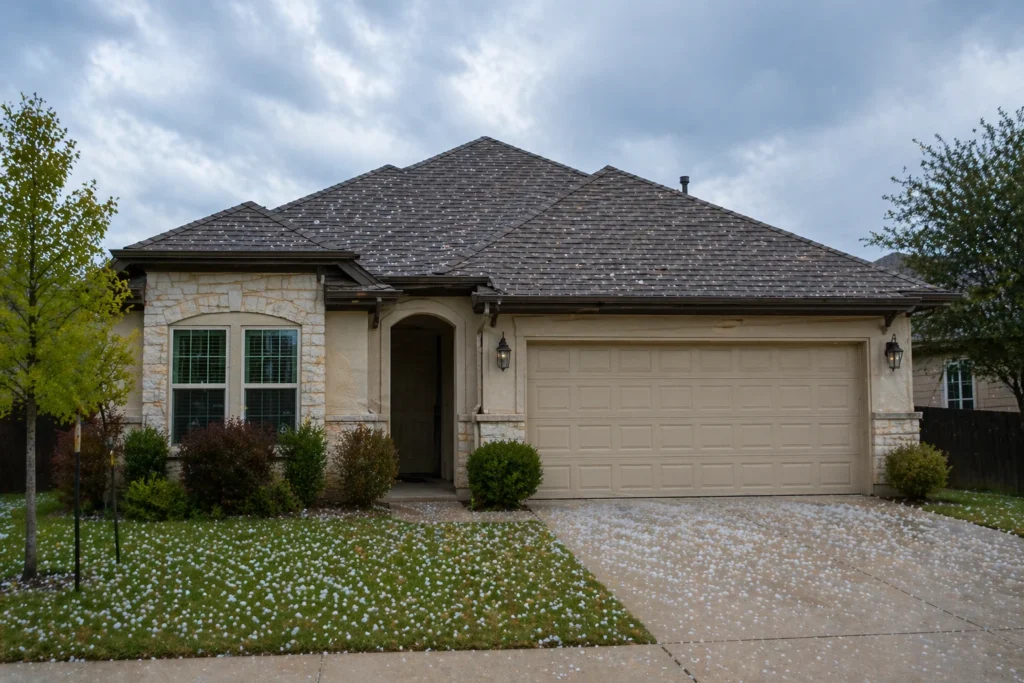
Step 1: Capture Wide-Angle Photos
Start with the big picture.
Take photos of:
- Entire roof slopes
- Each side of your home
- Surrounding property
These establish context. They show overall impact not just isolated damage.
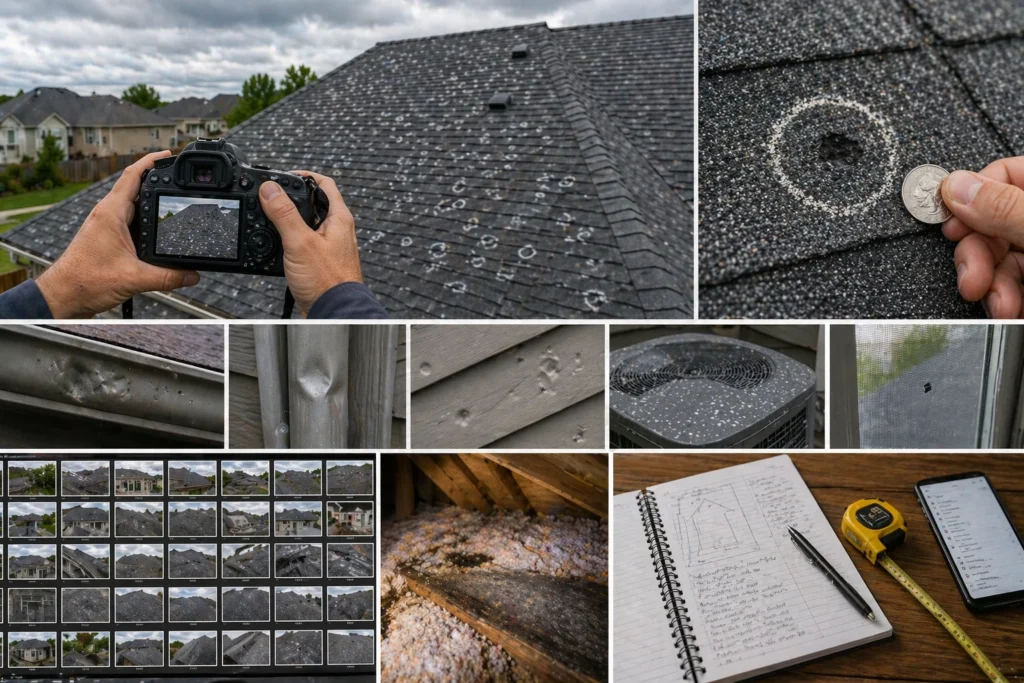
Step 2: Take Close-Up Shots
Now zoom in.
Focus on individual damage points. Always include a scale reference like a coin or ruler. Without it, the size of the damage becomes unclear and that weakens your claim.
Step 3: Document Every Elevation
Don’t skip any side of the property.
You need:
- Front elevation
- Rear elevation
- Left side
- Right side
Hail rarely hits evenly. Missing one side could mean missing legitimate damage.
Step 4: Record Date and Time
Use timestamps whenever possible.
If your camera doesn’t automatically record it, log it manually. Consistency builds credibility.
Step 5: Document Interior Damage
This step is often overlooked—and it shouldn’t be.
Look for:
- Ceiling stains
- Attic moisture
- Dripping water or insulation issues
- Paint bubbling or drywall damage
Interior damage helps prove that exterior damage isn’t just cosmetic it’s functional.
Step 6: Create a Detailed Damage Log
Photos show. Logs explain.
Write down:
- Location of damage
- Type of impact
- Severity
- Measurements
This becomes your narrative. And a clear narrative strengthens your entire claim.
How to Use Weather Data to Strengthen Your Claim
Photos alone aren’t always enough. You need to connect the damage to a verified storm event.
This is where weather data comes in.
Look for:
- Local hail reports
- Storm tracking maps
- Weather station data
Match the date of your damage with recorded hail activity. This adds a layer of validation that insurers respect. In regions like Corpus Christi, where storms can vary block by block, this step helps eliminate doubt.
Common Documentation Mistakes That Hurt Claims
Even small mistakes can have big consequences.
Avoid these:
- Taking too few photos
- Forgetting scale references
- Missing entire areas of the property
- Waiting too long to document
- Ignoring minor damage
Minor damage adds up. And often, those “small” issues lead to major repair costs later.
Organizing Your Documentation for Insurance Submission
Good documentation can still fail if it’s poorly organized. Think like an adjuster reviewing your file.
Best Practices
- Create folders by category (roof, siding, interior)
- Use clear file names (e.g., “Roof_North_Impact_1”)
- Keep notes alongside images
- Back everything up digitally
Clean organization speeds up review and improves your chances of a smoother claim process.
How Insurance Adjusters Review Your Documentation
Let’s shift perspective.
Adjusters are trained to look for:
- Clear, consistent evidence
- Measurable damage
- Alignment with storm data
- Complete coverage of the property
They also rely heavily on estimating platforms like Xactimate. These systems require precise inputs. If your documentation is vague, the estimate will be too. Detailed documentation gives you leverage. It creates clarity. And clarity leads to stronger payouts.
DIY Documentation vs Professional Documentation
At some point, you might wonder if you’ve done enough.
Here’s a simple comparison:
| Factor | DIY Documentation | Professional Documentation |
| Coverage | Often partial | Comprehensive |
| Accuracy | Depends on experience | Highly detailed |
| Hidden Damage | Frequently missed | Identified |
| Claim Strength | Moderate | Strong |
| Negotiation Power | Limited | Enhanced |
DIY can work if done well. But professionals take it further.
When to Bring in a Public Adjuster
There’s a point where documentation alone isn’t enough.
Consider professional help if:
- You’re unsure what you’re seeing
- Your claim feels underpaid
- The insurance estimate seems incomplete
- You missed early documentation
Public adjusters expand your documentation. They identify missed items. They build a stronger, more detailed claim. If you’re preparing a Hail Damage Roof Insurance Claim, this is often the stage where professional input can significantly change your outcome.
Real-World Example: Documentation Changes Everything
Let’s look at the numbers.
Scenario A: Minimal Documentation
- 12 photos
- No scale references
- Missing roof sections
Result:
Initial estimate: $11,600
Final payout: $11,600
No improvement. No leverage.
Scenario B: Detailed Documentation
- 80+ photos
- Clear scale references
- Full property coverage
- Detailed damage log
Result:
Initial estimate: $12,200
Supplement: +$9,000
Final payout: $21,200
Same property type. Same storm. Different outcome.
Advanced Strategy: Documenting for Supplements
Here’s where things get interesting. Initial estimates are rarely complete. Many claims require supplements additional requests for missed damage. Strong documentation makes supplements possible.
Focus on:
- Overlapping damage areas
- Code-required upgrades
- Hidden structural issues
- Consistency across all documentation
The better your initial documentation, the easier it is to justify additional costs later.
Pro Tips to Maximize Your Insurance Claim
Want to go beyond the basics? Do this.
- Take more photos than you think you need
- Use consistent angles for comparison
- Document before any repairs
- Keep original, unedited files
- Back everything up in cloud storage
And one more thing stay organized from the start. It makes everything easier later.
Final Thoughts: Documentation Is Your Leverage
Let’s bring it home. Understanding how to document hail damage for an insurance claim gives you control. It shifts the process from reactive to strategic. You’re not guessing. You’re building a case. And strong cases get results. Start early. Stay consistent. Document everything. If you do that, you won’t just file a claim you’ll support it with confidence, clarity, and leverage.
FAQs
Start by taking wide-angle photos of your entire property immediately after the storm.
Take as many as needed to fully capture all areas usually 50+ photos for complete coverage.
No, you can document from the ground, but roof-level photos provide stronger evidence if done safely.
A coin or ruler works best to clearly show the size of hail impacts.
Yes, but weak documentation often leads to lower payouts or denied claims.
Immediately after the storm, while the damage is still fresh and easy to verify.
Yes, interior damage helps prove the impact of exterior issues and strengthens your claim.
Missing areas, not using scale references, and taking too few photos are the biggest mistakes.
Yes, they help verify that a hailstorm occurred and support your documentation.
If your claim feels underpaid or documentation is incomplete, a public adjuster can help improve your outcome.